
Photos workflow
How to boost a video's volume straight from the Photos app
Quick answer
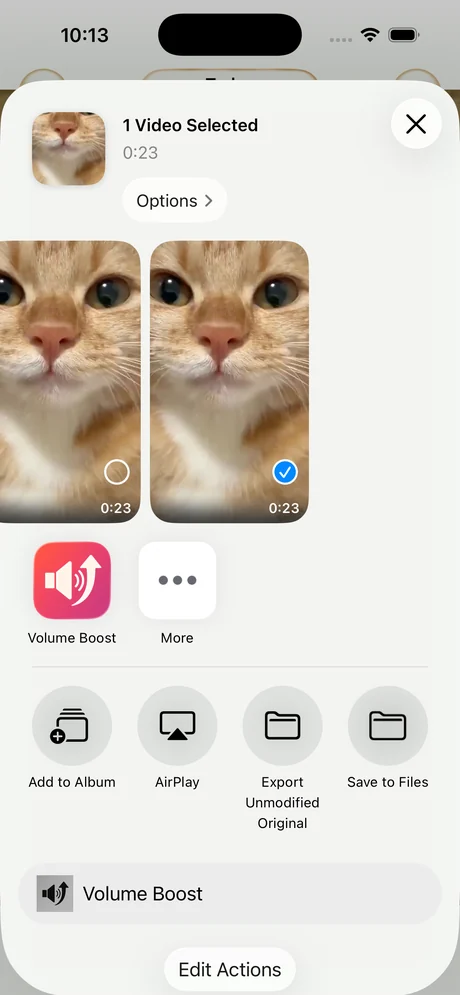
The Photos app cannot increase a video's volume; its editor only mutes the clip (and, on iPhone 16 or later, rebalances Spatial Audio recordings with Audio Mix). To boost a video from Photos: open it, tap Share, choose Increase Volume, drag Volume multiplication up to ×10, tap Boost Volume, then Download Processed → Save Video. The louder copy appears in Photos next to the original.
Most people look for a volume control in the Photos editor and do not find one, because there isn't one. Photos can trim, crop, colour-correct and mute a video, but it cannot make it louder. What Photos *does* have is a share sheet, and Increase Volume plugs into it, so the boost is two taps away from any video in your library.
This guide shows that workflow and what the Photos editor can realistically do for audio.
What the Photos editor can and cannot do with audio
- Mute: tap Edit, then the speaker icon at the top to remove the audio track entirely.
- Audio Mix (iPhone 16 and later, videos recorded with Spatial Audio): choose Standard, In-Frame, Studio or Cinematic to emphasise voices and reduce background noise. This changes the *balance*, not the overall loudness.
- Volume boost: not available in any version of the Photos app.
Boosting several videos
Increase Volume keeps a project list, so you can send several clips over from Photos and process them one after another. Each project remembers its file until you delete it, which makes it easy to come back later and try a different multiplier.
Step by step: from Photos to a louder video
No need to open Increase Volume first; start in Photos.
-
1
Open the video in Photos
Find the quiet video and open it full screen.
-
2
Tap Share → Increase Volume
Tap the Share button, scroll the row of app icons and tap Increase Volume. A new project opens.
-
3
Boost
Drag Volume multiplication to the level you need (×3–×10), enable Improve Audio Quality for speech, and tap Boost Volume.
-
4
Compare
Use the Original/Processed toggle to hear the difference.
-
5
Save Video
Tap Download Processed, then Save Video. Back in Photos, the louder copy sits right after the original.

Do it in Increase Volume
Free on the App Store. Import, drag the slider to ×10, tap Download Processed.
Tips
- Add Increase Volume to your favourite apps in the share sheet (tap More → Edit) so it is always first in the row.
- You can also share a video from Files, Messages or Mail directly into the app; the workflow is the same.
- To free space, delete the quiet original after confirming the boosted copy sounds right.
Questions people also ask
Does boosting from Photos replace my original video?
No. Increase Volume always writes a new file. Saving it with Save Video adds a second copy to Photos; the original remains unchanged.
Can I boost Live Photos or Slo-mo videos?
Slo-mo and time-lapse videos export as regular video files and can be boosted. Live Photos are photos with a short clip attached and are not supported as video.
Why doesn't the Photos app have a volume slider?
Apple positions Photos as a quick-fix editor and pushes level changes to iMovie. iMovie raises volume to about 500%; Increase Volume goes to ×10 and works from the share sheet.
Increase Volume makes the audio inside a file louder and saves a new copy. It cannot raise the hardware volume limit of the iPhone speaker or change system-wide playback volume.